Progress Report
The time has come… I have been promoted from Phase 2 to Phase 3. That means I’m nearly 40% of the way through Flatiron! That’s crazy to think about. But what I may honestly find more crazy, is the massive jump in the knowledge that I have had simply from Phase 1 to Phase 2. Being that React is built for UI, making an application using it granted so much of a headstart as compared to our first project. This was the best part of moving forward in this phase.
I’m very excited to take you on a journey and see what we were able to build over the past week. I know that you’ll enjoy seeing it. It was so easy to be proud of this project after the long week Shani and I had, working and studying.
Learning ReactJS was a completely different ball game than vanilla JS. There have been many hurdles to overcome this week, more specifically covering our CSS at the end of the project. But the functionality has truly given me the grace to be proud.
It all starts with an idea…
One of the great things about Flatiron is that we are really reinforced in teamwork qualities through these moments of paired programming. So much like the last project, this one will start with creating a planned outline of how the project will run. We started off with the idea of a Health and Wellness planner. The planner gave us a list of tasks to do each day so that we would ideally be prepared every morning at 9 AM CST with an agenda when we started coding.

So essentially the plan is to create an application based on these core deliverables offered by my program:
Requirements:
- You must make a single page application (only one index.html file) using create-react-app
- Your app should use at least 5 components in a way that keeps your code well organized
- There should be at least 3 client-side routes using react-router
- Use a json-server to create a RESTful API for your backend and make both a GET and a POST request to the json server. Additionally, you may choose to incorporate data from an external API but it is not required. (You should keep your json-server data simple: avoid nested data and associations. You’ll learn how to work with more complex data in the next two phases. Focus on the frontend for this project)
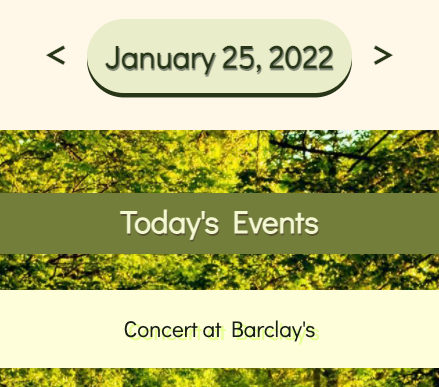
So taking these deliverables into consideration, our instructor Adam told us that when building a new project, something that is very ideal is to get the simplest most baseline version of the project out. So that’s exactly what we did. Our app is a calendar app, we want to display today’s date, a daily quote, reminders for the day, events taking place on each day, and a daily exercise for the day. After learning <Switch> and <Route> earlier in the week, it was clear that this would be a perfect time to implement the different “pages” in our app.

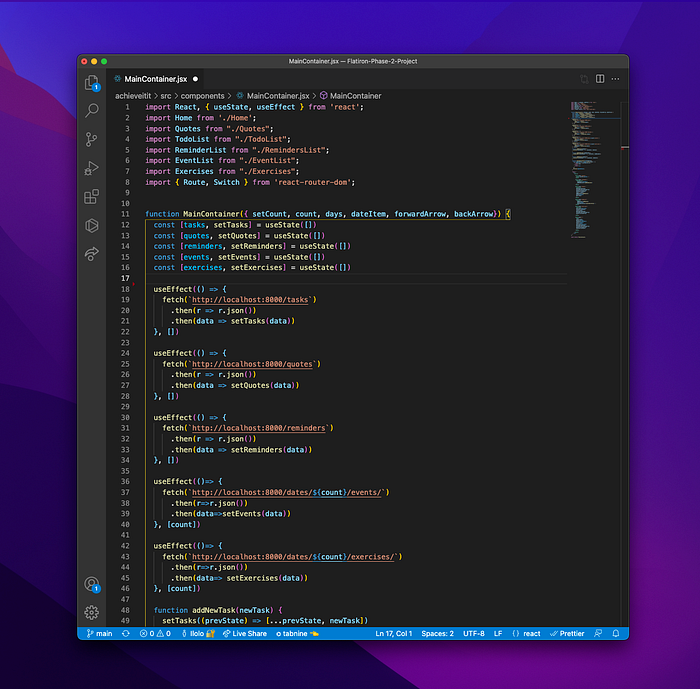
After days of getting the basic parts of the application up and running the first task at hand that we had was to link the data from our db.json file to our JS files using the useEffect hook. You can learn more about it in my previous blog post here.
ReactJS simply makes things run much easier, by the end of Monday we were able to get a good idea of how the site was going to look. This is because of react’s ability to bring components to the DOM. We spend this day creating components for our home page, reminders, quotes, events, exercises, tasks, and everything under them. In the image below you can see a little bit more of our component tree.
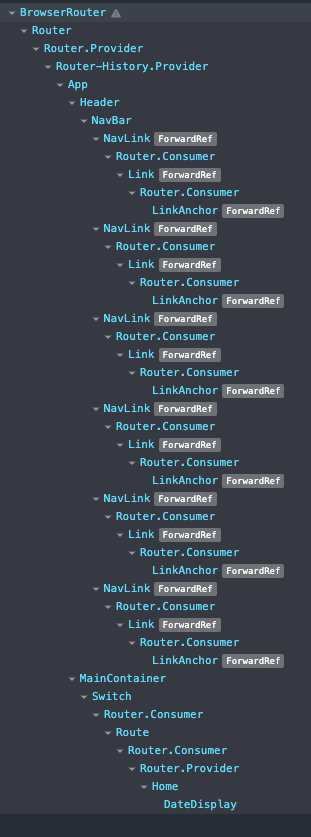
My proudest moment of code was probably organizing everything into our Main container JS file. The main container is where we organize the majority of our props and sent them throughout the other files from then on.
As you can see from this, there was clearly a lot of code. And honestly probably too much to cover in one blog post so I’m going to keep this relatively surface level so that nobody gets incredibly bored. I would like to think that my blogs are more about progress than teaching. But anyway, the result of making props of different State variables in MainContainer allowed us to call them at the lowest branch of our component tree. This is amazing because it allows for more dynamic abilities in our project such as changing the date in our calendar to show the different tasks and events per said date.
The date was able to change because we created an array of days that when clicked by the button would increment the id of the date in the array, which in turn would change the date.
CSS and Styling
With this being a health and wellness calendar we wanted to build a palette that would be very aesthetically pleasing. We spent avid research on a website called coolors.co which gave us neutral tones that would express exactly what we wanted.
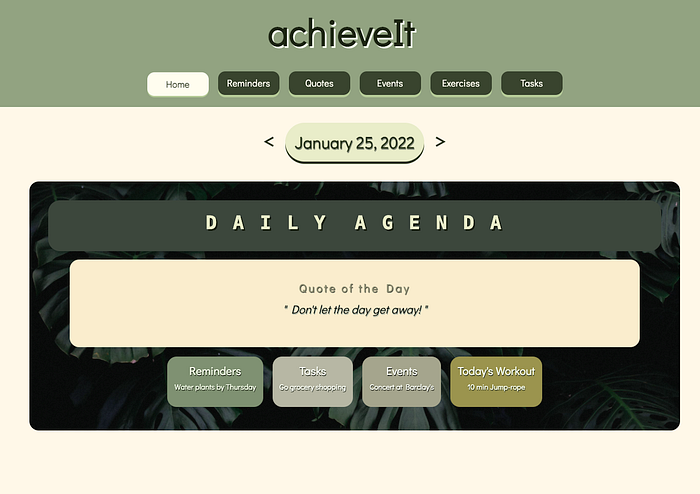
The CSS alone, I think shows the overall improvement from my website to our second. My partner and I truly spent hours here, trying to make it look so beautiful. And I am honestly very proud of what we were able to achieve. One of the best features that I was really excited to implement was the dark mode button. Here is exactly how we did that:
import React, { useState } from 'React';
export default function Header() {const [isClicked, setIsClicked] = useState(false)function myFunction() {let element = document.body;element.classList.toggle("dark");setIsClicked(isClicked => !isClicked);}
return (<><button className="dark-mode-btn" onClick={myFunction}>{isClicked ? "☾" : "☼"}</button></>);
}
Unfortunately, we were not able to get the react styled components to work, but I’m still glad this .toggle function to work instead.
Regardless, I hope that you have enjoyed this blog post and the demo that I will be showing for you below!
Now…on to Phase 3!